Depth-of-field
Depth-of-field explained technique
Once you grasp the basic principles of focusing your photographs will take on a whole new depth.
Words Steve Bavister, Images Peter Bargh
This zone of sharpness is called the depth-of-field, and it extends in front of and behind the point that you actually focused on. The size of the zone is determined by three key factors - the aperture of the lens, the focal length of the lens used, and the distance you are from the subject. Varying these three elements allows you almost complete control over the depth-of-field in a picture.
When most of the picture is sharp, we say there's lots of depth-of-field. When only part is sharp, we say depth-of-field is limited. As we'll see later, whether you go for extensive or limited depth-of-field depends upon the subject matter and how you want to depict it.
Three main factors that can be used to control depth-of-field
1 The aperture.
Depending on lighting conditions and your film stock, you may need to use a tripod or some other form of support at such small apertures, as the resulting long shutter speeds create a risk of camera-shake.
If, however, you want to concentrate attention on just one part of the scene, and throw the rest out-of-focus, you should select a large aperture. Exactly how large this can be depends on the maximum aperture of the lens you're using. On a 50mm standard lens it will be f/1.7, f/1.8 or f/2, but on a standard zoom it will typically be f/3.5 or f/4.5.
For general picture-taking, when you want most of the picture to be in focus, you might want to set a middling aperture of around f/8 to f/11.
This is what a program exposure mode sets when left to its own devices Whenever possible you should take control of aperture selection and use either an aperture-priority or manual mode.
2 The focal length of the lens.
Attach a wide-angle lens and you'll benefit from extensive depth-of-field, which makes it easy to keep everything in focus. The wider the angle-of-view, the greater the depth-of-field. Choose a telephoto lens and the depth-of-field is immediately more limited. The longer the focal length, the more restricted the zone of sharpness is.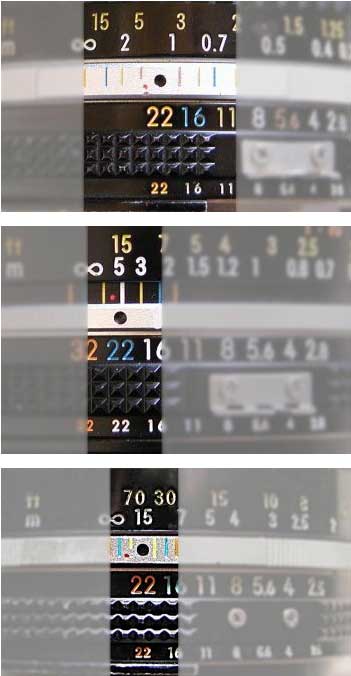
3 The Camera-to-Subject Distance
For various technical reasons, the closer you get to the subject the more limited the depth becomes. In fact, when shooting close-up subjects it can extend to just a few millimeters in front of and behind the subject.So that's the theory, but what does it all mean in practical picture-taking terms?
Four common techniques using depth-of-field
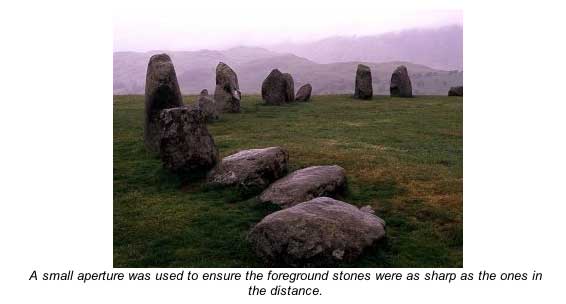
Use these four common approaches when planning a shot to ensure depth-of-field works for you1 Everything sharp.
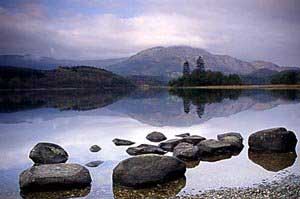
With subjects such as landscapes, groups, interiors and travel you'll usually want to keep everything sharp. Using a wide-angle lens set to a small aperture will give you extensive depth-of-field, perhaps from around one meter through to infinity. But there will be times when foreground interest is closer than that. Here you need to resort to a neat little technique called hyperfocal focusing that allows you to increase the depth-of-field.As a rule-of-thumb, there's twice more depth-of-field behind the subject than in front of it. So if you photograph a distant subject such as a landscape and focus on infinity you waste lots of depth-of-field. By focusing a little closer, you'll extend the depth-of-field at the front so it comes nearer to the camera, while still making sure that infinity falls within the depth-of-field behind the actual point of focus.
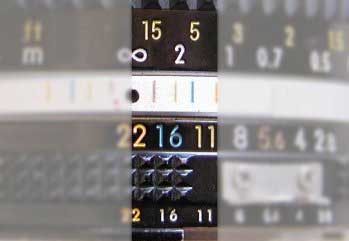
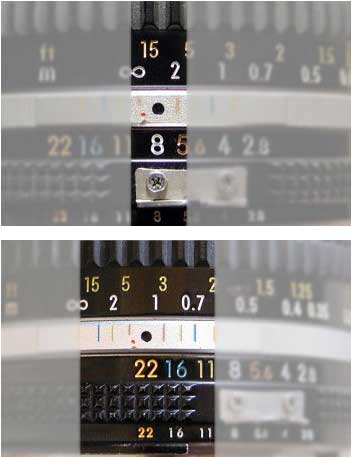
If you focus on infinity all the potential sharpness beyond infinity is wasted and the closest zone of focus, on this 28mm example, is about four feet.
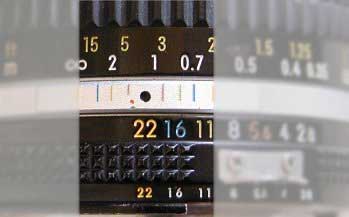
Adjust the lens so that the infinity setting is on the marking of the aperture you have selected to extend the zone of sharpness to about two feet.
2 Main subject sharp with background completely out-of-focus.
There are some subjects where you want the main subject to stand out strongly from an out-of-focus background. Portraiture, where the emphasis is on the person, rather than the location, is probably the most popular area. What you need here is a use a telephoto lens at its widest aperture. It's also worth moving the subject as far away as possible from the background - in cramped studio situations this is often impossible but outside against a wall or foliage it's usually easier. Take care, though, that you focus accurately, as the limited depth-of-field will be unforgiving of any focusing errors. For portraits focus on the eye for the best results.
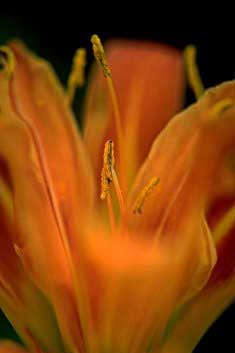
3 Main subject sharp, with background out-of-focus but still recognizable.
Sometimes throwing the background completely out-of-focus is going too far. You want to show the subject in its natural environment, but with the background toned down to it doesn't compete for attention. A person on the beach, for instance, an animal in the zoo, or a flower in a garden. Here a standard to short telephoto lens, somewhere from 50mm to 135mm, is ideal - especially if it's coupled with a middle range aperture of around f/8.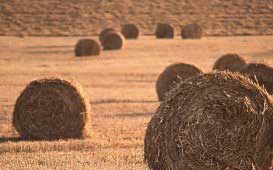
4 Zone of sharpness deliberately limited.
Occasionally you may want to limit the depth-of-field to a very specific zone. Maybe in a portrait you want just the eyes in focus, and not even the ears or the tip of the nose. Here, once again, a depth-of-field scale on the lens helps, or, failing that a depth-of-field preview facility on the camera, This will give a visual indication of what will and won't be in focus by manually stopping down the lens.